What Is Reticello? A Beginner's Guide to Italian Needlelace


If you've ever come across a piece of embroidery with delicate lace-like patterns sitting inside a neat grid, there's a good chance you were looking at reticello. It's a traditional Italian needlelace technique, and it looks far more complicated than it actually is once you understand the steps.
Reticello combines two things: a withdrawn-thread grid (where threads are removed from the fabric to create an open framework) and needlelace stitching worked over that framework to build up beautiful, delicate motifs — flowers, leaves, geometric patterns, whatever you like. The contrast between the crisp grid and the soft, lacy stitching is what gives it that lovely, heirloom look.
It doesn't have to be perfect, it's unique and hand made — and reticello is a wonderful technique to slow down with. Once you're past the grid stage, the rest is genuinely relaxing.
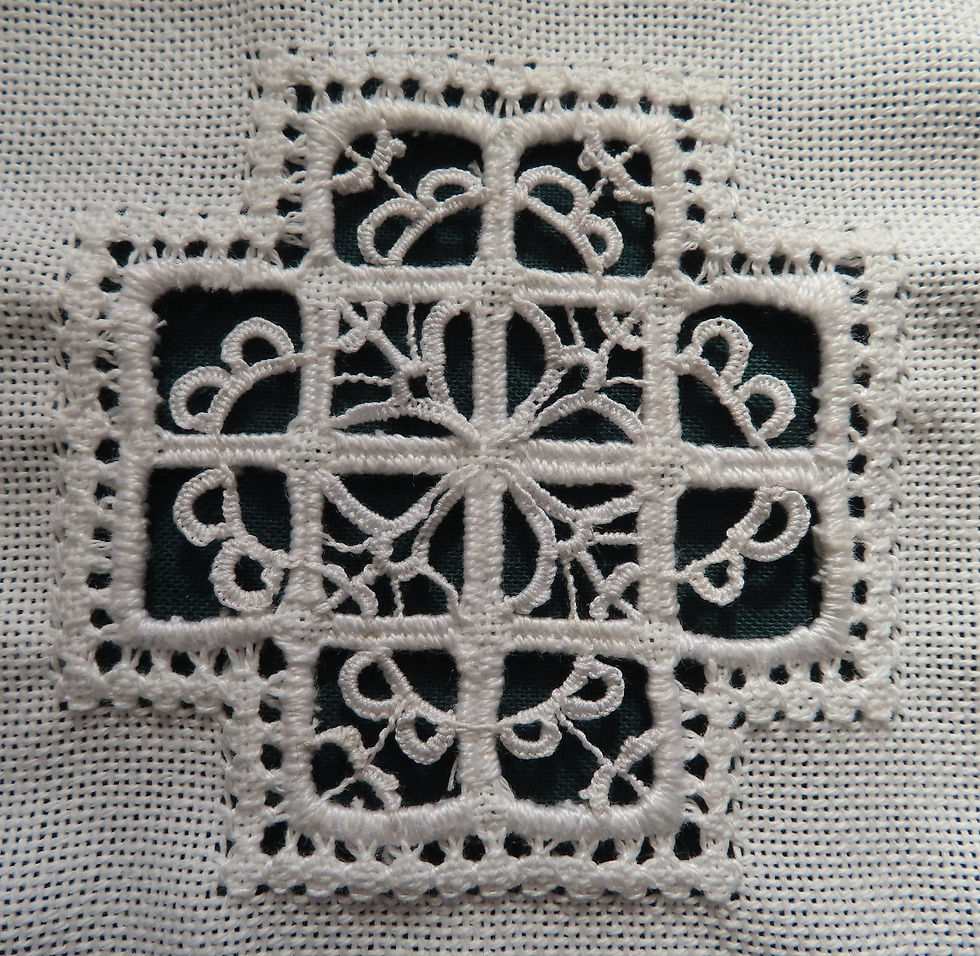
What You'll Need

Evenweave or counted-thread fabric
An embroidery hoop
DMC cordonnet special and special dentelles thread
A tapestry needle for the grid work, and a fine embroidery needle for the needlelace stitching
Small, sharp embroidery scissors — you'll want these to be precise
How Reticello Comes Together
1. Mark out the grid
The first step is marking out your reticello grid using a contrasting coloured thread. Take your time here — if the grid is marked out incorrectly, it throws off everything that follows once you start withdrawing threads.

2. Withdraw the threads

With your grid marked, it's time to start withdrawing threads to form the open framework. This is the step to go slowly and carefully with — a wrongly cut thread is hard to undo, so double-check before you snip.
3. Four-sided stitch around the edge
Once your grid shape is withdrawn, work four-sided stitch around the edge. This isn't just decorative — it holds the withdrawn threads securely in place and gives the whole grid its stability.

4. Wrap the internal bars

This is one of the most satisfying parts of the whole process. Wrapping the bars that make up your grid is genuinely calming — a nice change after the concentration needed for the cutting stage. Once the bars are wrapped, go around and wrap the edge too, to neaten everything off.
5. Add your stems and needlelace leaves
With your grid complete, stitch in the stems and needlelace leaves that will carry your design. It's worth doing these before your main motifs, since you'll want your flowers (or whatever you're stitching) to cover the ends of the stems neatly.

6. Finish with your needlelace motifs

Finally, add your needlelace flowers — or whatever motif you've chosen — over the grid and stems. And there you have it: a finished piece of reticello, ready to be framed, hooped, or made up into something special.
Ready to Try It Yourself?
If reticello has caught your eye, my Reticello Floral Daisy Embroidery pattern walks you through the whole process step by step, with clear photos and instructions to guide you along the way — so you can relax, enjoy the process, and end up with something really beautiful to be proud of.

Comments